
Why audio preparation matters
Good transcription does not start when a file is uploaded. It starts much earlier, with the quality of the recording itself. Even advanced AI tools work best when the audio is clear, balanced, and easy to follow. If a file has loud background noise, overlapping voices, sudden volume changes, or unclear speech, the final text may contain more errors and require more editing. That is why audio preparation is an important topic for anyone who wants fast and reliable audio to text results. It complements the transcription process by helping users create files that are easier for AI systems to understand. For students, professionals, journalists, creators, and researchers, a few simple steps before and after recording can save time later. Preparing audio well also improves readability, supports better searchability, and makes transcripts more useful for documentation, accessibility, and content reuse. A strong workflow is not only about choosing a transcription tool, but also about giving that tool the best possible input.
Many people assume that transcription quality depends only on software, but the source audio plays a major role. AI transcription systems analyze speech patterns, word boundaries, pauses, and speaker changes. When the recording is messy, these signals become harder to detect. A poor microphone placed too far from the speaker may create hollow sound. A noisy room may hide important words. Multiple people talking at once can reduce clarity for both humans and machines. In contrast, clean audio helps the system identify words more accurately and produce text that needs less correction. This does not mean users need expensive equipment or a studio setup. In most cases, small improvements make a noticeable difference. Choosing a quiet room, reducing echoes, keeping a steady speaking pace, and testing sound levels can all help. These practical steps are useful for anyone recording lectures, voice notes, interviews, podcasts, meetings, or video narration and later converting that speech into text.
How to record clearer speech
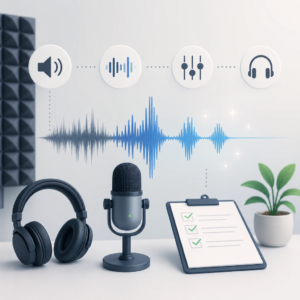
The best time to improve transcription quality is before pressing record. Start by selecting the quietest environment available. Close doors and windows, silence notifications, and turn off fans or other devices that create constant noise. Hard surfaces can cause echo, so rooms with curtains, carpets, cushions, or bookshelves often work better than empty spaces. Next, place the microphone at a reasonable distance from the speaker, close enough to capture detail but not so close that breathing sounds become distracting. If possible, use a dedicated microphone or a good headset, but even a phone or laptop can work well in the right conditions. Encourage speakers to talk one at a time and to avoid interrupting each other. Clear pacing also matters. Speaking too fast can blur words together, while speaking too softly can hide consonants and key details. A short test recording is helpful because it allows users to listen back, check volume, and fix issues before creating a longer file that may be harder to transcribe accurately.
Consistency is another important part of good recording. Sudden changes in volume or microphone position can make speech harder to process. If one speaker leans away from the device, their voice may fade and become less clear in the transcript. In interviews or meetings, try to keep the recording device centered and stable. If several people are participating, ask them to introduce themselves clearly and speak toward the microphone when possible. For remote conversations, a stable internet connection and quality headsets can improve the source audio before it is saved as a file. It is also useful to avoid music in the background unless it is necessary for the content. Even low background music can interfere with spoken words. If special terms, names, or technical language will be used, speakers can pronounce them carefully the first time. That simple habit can reduce confusion later. Good recording practices do not need to be complicated, but they create a cleaner foundation for any audio to text workflow.
What to check before uploading a file
Once the recording is complete, a few checks can improve results before transcription begins. First, listen to a short section from the start, middle, and end of the file. This helps confirm that the sound remains clear throughout and that there are no unexpected drops, clipping, or silent sections. It is also wise to confirm that the file format is common and easy to process. Many transcription tools support standard audio and video formats, but a well-saved file with stable quality is usually the safest choice. If the recording contains long empty sections, trimming them can make the transcription process more efficient. If there are repeated sound checks or off-topic introductions that are not needed, removing them can also help. Organizing files with clear names is another simple but useful step, especially for users handling many recordings. A descriptive file name can save time when reviewing transcripts later. These small actions support a smoother upload process and make the final text easier to manage in personal, academic, or business workflows.
Audio enhancement can also be useful when done carefully. Basic cleanup, such as reducing constant background noise or adjusting uneven volume, may help produce clearer transcripts. However, strong audio effects can sometimes damage speech detail, so it is usually better to make light corrections rather than aggressive changes. The goal is not to create perfect studio sound. The goal is to make spoken words easier to understand. If different speakers are extremely unbalanced in volume, a moderate level adjustment can help. If there is a loud hum or hiss throughout the file, simple noise reduction may improve clarity. At the same time, users should avoid overprocessing that makes speech sound metallic or unnatural. When in doubt, compare the edited version with the original and choose the one that preserves voice clarity. For important recordings such as interviews, lectures, or business meetings, it can be useful to keep the original file as a backup. This allows users to retry transcription later if needed or compare results across different versions of the same recording.
Building a simple workflow for better results
A practical transcription workflow often leads to better outcomes than a rushed upload. One effective approach is to follow a repeatable sequence: prepare the space, test the microphone, record clearly, review the file, then upload it for transcription. This process is easy to apply whether the content is a voice memo, webinar, team meeting, research interview, or classroom lecture. Users who create recordings regularly can benefit from a simple checklist. For example, confirm battery levels, free storage space, microphone placement, room noise, and speaking order before recording starts. After the recording, label the file, listen briefly for quality issues, and decide whether trimming is needed. A consistent method reduces mistakes and supports faster turnaround. It also helps teams work more efficiently when several people are involved in recording and transcription. Over time, this workflow can improve both the speed and quality of audio to text conversion. Instead of relying only on post-editing, users prevent common issues before they reach the transcript.
This preparation is especially valuable for content that will be reused in multiple ways. A clean transcript can support blog writing, subtitles, meeting notes, research summaries, training materials, and searchable archives. When the source audio is strong, these downstream tasks become easier because the text needs fewer corrections. That can be important for businesses managing internal communication, creators publishing across platforms, and educators sharing accessible learning materials. Better preparation also supports accessibility goals by making spoken content more available in text form. In many cases, the effort required is minimal compared with the time saved later. Spending a few extra minutes on setup can reduce the need for major transcript editing. For anyone using AI transcription tools on a regular basis, audio preparation should be seen as part of the overall strategy, not an optional extra. Clear recordings lead to clearer transcripts, and clearer transcripts create more value across every stage of content use.
As AI transcription becomes more common, users who understand the importance of audio preparation can achieve better results more consistently. The main idea is simple: strong input supports strong output. Clear speech, low noise, stable recording conditions, and light file review all contribute to more accurate text. These steps do not require expert knowledge or expensive tools. They rely on practical habits that almost anyone can adopt. Whether the goal is to transcribe a short voice note or a long professional discussion, preparing the audio first is one of the most effective ways to improve efficiency and transcript quality. It helps users get more reliable text, spend less time correcting mistakes, and make better use of AI-powered audio to text technology. In a crowded digital workflow, that combination of accuracy, speed, and simplicity matters. Audio preparation is therefore not a minor detail, but a core part of getting the most from any transcription process.


